7. REMOTE CONTROLL VIA BLUETOOTH
![]()
YOU LEARN HERE... |
how to establish Bluetooth communication between two Bluetooth-enabled robots and how to remotely control the robot. |
SENDING AND RECEIVING |
|
EXAMPLES |
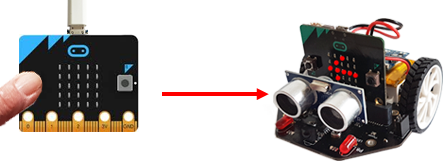
Example 1: Click the button on micro:bit to appear an arrow on the mbRobot
First, load the programme onto the mbRobot and switch on the power supply. Then you can remove the USB cable and use it for transmission and programme execution on the second micro:bit. The connection is established with radio.on(). After that, each device waits in an endless loop to see if a button is pressed (in which case it sendsa message) or if it receives a message (in which case it executes the corresponding command). Program: from microbit import * #from mbrobot_plusV2 import * import radio radio.on() while True: if button_a.was_pressed(): radio.send("left") elif button_b.was_pressed(): radio.send("right") rec = radio.receive() if rec != None: if rec == "left": display.show(Image.ARROW_E) elif rec == "right": display.show(Image.ARROW_W) sleep(10)
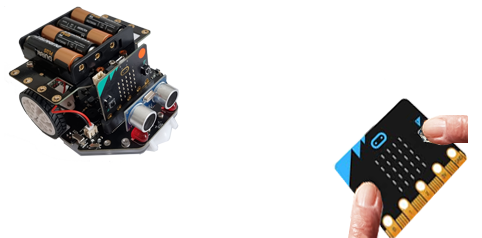
Since you want to control the moving robot, in this example you use the micro:bit as the transmitter and the mbRobot as the receiver. Since the transmitter does not need all mbRobot commands and vice versa, it makes sense to use two different programmes. Control is as follows:
So-called state programming is very useful in this example. There is no point in sending a ‘FORWARD’ message every 10 milliseconds if the other robot is already driving straight ahead. A message is only sent if the state has changed (oldState != state). Program for the transmitter: from microbit import * import radio radio.on() display.show(Image.YES) state = "STOP" oldState = "" while True: if button_a.is_pressed() and button_b.is_pressed(): state = "FORWARD" elif button_a.is_pressed(): state = "LEFT" elif button_b.is_pressed(): state = "RIGHT" else: state = "STOP" if oldState != state: radio.send(state) oldState = state sleep(10) After the programme starts, an "Ok"-sign sign is displayed on the mbRobot to let you know that it is ready. It then waits for commands, which it receives via Bluetooth. If it receives the message ‘FORWARD’, it executes the command forward() and remains in this state until it receives a new message. With “LEFT” it moves in a left arc, with ‘STOP’ it stops. Program for the receiver: from mbRobot import * #from mbrobot_plusV2 import * from microbit import * import radio radio.on() display.show(Image.YES) while True: rec = radio.receive() if rec == "FORWARD": forward() elif rec == "LEFT": leftArc(0.1) elif rec == "RIGHT": rightArc(0.1) elif rec == "STOP": stop() sleep(10) To move freely with the control unit, you can use a power bank to supply power to the micro:bit after downloading the program. |
REMEMBER... |
To use the commands for Bluetooth communication, you must import the radio module. The connection is established with radio.on(). A message is sent with radio.send(msg), and with radio.receive() it is received on the other device and stored in a receive buffer until it is retrieved. |
TO SOLVE YOURSELF |
|
![]()