loslegen
Deutsch   English   Français

GETTING STARTED


YOU LEARN HERE...


how to develop a program with Python and run it on the micro:bit.


PROGRAM DEVELOPMENT


Start TigerJython and edit the program in the editor window. Attach the micro:bit to the USB port and click the download button. A terminal (console) window opens and the program is run under the MicroPython (Python 3) interpreter which is part of the firmware. A running program can be stopped by typing Ctrl+C and restarted by typing Ctrl+D. The terminal window is automatically closed and reopened when the next program is download.
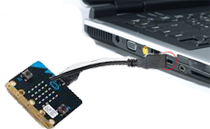


CONNECTION VIA USB


When the micro:bit is connected to the computer via a USB cable, it is detected as an additional external USB device (under Windows with a drive letter).

For Windows operating systems older than Windows 10, you must install a special driver for the serial communication used by the terminal window. You can download it from here mbed.zip. Unpack and execute  the exe-file with a mouse click. To do so, you need administrator rights.


INSTALL FIRMWARE


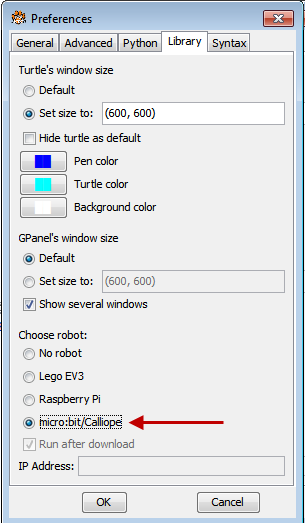
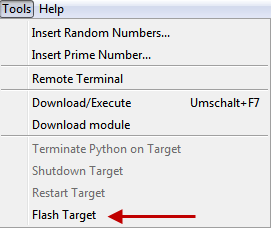
Download TigerJython and install it. Under Settings|Libraries choose the option micro:bit/Calliope. This setting remains saved and is also required for downloading/executing programs. In the Tools menu, select Flash target .


On the micro:bit the yellow LED next to the USB socket starts to flash. If the download is finished, the message "Successfully transferred file to micro:bit" appears in TigerJython's output window.

Your micro:bit is now ready for programming.


EXAMPLE


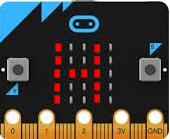
To make your first steps, edit and run a program that writes some short scrolling text to the LED display. In the editor, type in the program below, or click Copy to clipboard and paste it with Ctrl + V into the editor window.

Program:

from microbit import *

display.scroll("HELLO PYTHON!")
► Copy to clipboard

 
  Check if the micro:bit is connected to the computer and click the Download / Run button.

Next to the TigerJython a terminal (console) window appears. Print output and error messages are shown here.

If HELLO PYTHON is displayed as scrolling text, your micro:bit development system is operating correctly.

The program code is easy to understand: The first line of the program imports the microbit module and provides the objects and functions from this library, for example the object display with which you access the LEDs. With the command display.scroll ("HELLO PYTHON!") you can display short messages as scrolling text. Note that the text must be in single or double quotes!
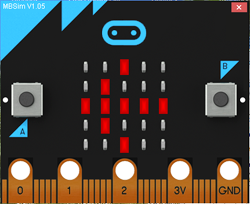


SIMULATION MODE

 
To run the same program in simulation mode, just click the green start button

In simulation mode an image of a micro:bit is shown. Buttons and pin input are manipulated using mouse clicks. When starting the next program, the previous window is closed automatically.


USING THE ONLINE EDITOR


Instead of TigerJython you can use our Online Editor as development platform for MicroPython programs running on the micro:bit.
Here are some pros and cons of using Python Online over TigerJython:

 Pros  Cons

No IDE installation needed

Program development under every platform that have a USB port for external SD cards (also tablets)

No terminal window (console)
- error messages as scroll text
- no print output

No simulation mode

This is how you proceed:

1.

Connect the micro:bit to the USB port. It must appear in the file system like an external SD card named MICROBIT. Check this with a file explorer

2.

Visit the page www.python-online.ch/editor.
Choose the English language option and select microbit in the Robot list box. Then type in the program in the editor window  or copy it from the clipboard. Save the program with Save As under any name, e.g. first.py. Depending on the settings in your browser, you will be asked where to save the program


3.

Click on Transfer. Depending on the setting of your browser, you will be asked where the file first.hex should be stored. This is the machine program in hex format that has to be copied to the micro:bit

4.

Copy first.hex with a file explorer to the device visible under 1 as MICROBIT

5. The yellow LED of the micro:bit flickers and the program starts

Note: You should leave the file explorer open so that you can immediately copy the next program to the micro:bit. In this tutorial, each example program has a link that immediately copies the program to the online editor.

Program:


MEMO


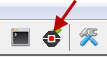
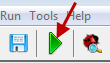
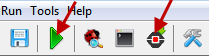
Programs for the micro:bit are written using the TigerJython program editor. To download and run the program on the micro:bit, click the black button Download/Run. Program execution in simulation mode is started by clicking the green arrow button.

  Simulation Download to micro:bit
 

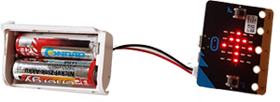
The last downloaded program is stored on the micro:bit and program execution starts automatically the next time a power supply is connected (or the reset button is clicked).  If the program blocks the micro:bit entirely due to fatal error, you have to flash the micro:bit again.


EXERCISES


1.
Write different messages as a scroll text (even small letters are allowed).

2.

Write a message that repeats itself endlessly. To do so, use the additional parameter loop = True in the scroll() function. When a program runs endlessly, you can cancel it in the terminal window with Ctrl+C (and restart it with Ctrl+D) or just by downloading another program.


REMARKS


After the program finishes, the command-line prompt of the Python interpreter >>> is shown and you can type and execute Python commands interactively. With the key combination Ctrl+D a downloaded program is run again.

If you ever want to cancel a longer running program, type Ctrl+C. As an alternative, dowload another programm to cancel the present one.

Your program remains stored on the micro:bit until you overwrite it with a new program (or the micro:bit is flashed). Therefore you can unplug the micro:bit from the computer and connect it to another power source, such as a USB charger or PowerBank to run the program standalone.  


You can also plug-in the connector of a battery holder and use two 1.5V batteries (non-chargeable AA or nickel-zinc batteries) . Pay attention to the correct polarity!


To run a program multiple times, you can click the reset button, which is located next to the USB port, instead of interrupting the power supply.


1-2
Technical information:

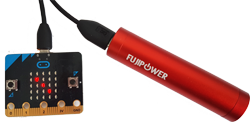
If you are having trouble with the USB port, try another USB cable. Some USB cables, especially those supplied with PowerBanks, can only be used for charging and not for data transfer.

1-4
Technical information:

The firmware can be considered as a small operating system, which is also responsible for communication with the development system (The micro:bit appears on the PC as an external storage device and can exchange data as a serial device (COM port)). In addition, the firmware contains the MicroPython interpreter and the API for controlling the hardware.

The firmware is written in C++ and is available in public domain. We have slightly modified it so that error messages are no longer displayed on the LED display, which impedes the development process considerably.